Saturday, November 28, 2009

Victorian Wedding


As soon as I finished my sister's wedding dress, I started working on a gorgeous Victorian wedding gown for a colleague, C.  She has a PhD in history with an emphasis on Victorian women's experiences.  Her mother is from Finland, and she really wanted to incorporate sapphire blue and silver into the gown to honor her heritage.  We worked on the design process, the muslin, and choosing material and trims over the summer.  As soon as we got home from my sister's wedding, I began sewing this gown in earnest.  In some ways, it was much easier than my sister's gown.  I was less emotionally invested in it (though I still wanted it to be perfect) and even though there were many trims and details, there was no lace to rework.  Lace can be a real pain to work with.  It has to be cut perfectly and mostly hand sewn so that it looks like one continuous piece of fabric, but in the form of a bodice or skirt edge or sleeve. 

C. and I had five fittings in the last weeks before her wedding.  She, and everyone at the wedding, were in love with the dress.  It was perfect for her, exactly what she wanted, and I was very pleased with how it turned out.  There were four separate pieces: the bodice, the overskirt and bustle, the underskirt, and the petticoat.  The bodice has two layers of hand-ruffled lace, gathered brocade, and beading around the neckline, with a rhinestone pin in the center of the gathered brocade.  The silver brocade center is offset by sapphire velvet ribbon and silver Venice lace trim.  The rest of the bodice is silver dupioni silk. C. really wanted a corset-tie back, which I incorporated, using blue rat tail as ties.

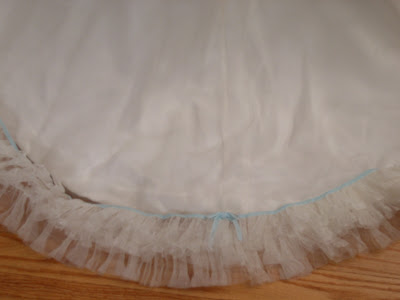
The oveskirt and bustle of the gown are silver dupioni silk lined with netting for stiffness and "buoyancy."  I wanted to stay true to the Victorian silhouette, but make the gown lighter and easier to wear.  The netting held the shape of the bustle as C. danced, sat, walked, and knelt.  The front of the overskirt is trimmed with two layers of beading.  The back train of the bustle is trimmed with two rows of blue velvet ribbon and two rows of hand-pleated trim--one silver satin and one sapphire taffeta.  Rhinestone bustle clips are scattered among the bustle folds in the back.

The underskirt is sapphire taffeta with a silver brocade inset in the center front.  The bottom of the skirt is trimmed with hand-pleated silver brocade and sapphire taffeta trim and silver braid.  Rhinestone flower trim separates the silver brocade from a sapphire taffeta border on the front of the skirt.

All the elements really worked well together and C. looked beautiful the whole day!

Sunday, November 22, 2009

All Dressed Up


I posted once before about my sister's wedding gown.  I started to explain the process and showed some of the design choices she chose from.  She was married in October and her photographer took some amazing pictures of her and the gown and is kindly allowing me to post them here to show you.  Please visit her blog at www.threewinksstudio.com/blog to see more of her work.

Mary's dress was a challenge in some ways.  The biggest problem I ran into was just having too little time between the fitting and the wedding.  While we fitted the muslin in the summer, I have to do several more fittings after that, sometimes as many as eight more.  My sister and I live in different states, so she had to fly out to Kansas for her fitting.  She couldn't come until two weeks before her wedding, which left very little time for me to finish everything that had to wait until the fitting was done.  I literally sewed for the whole two weeks in every spare moment, and then sewed the three days leading up to her wedding with very few breaks.  I totaled about 14 hours of sleep in four days.  To my very critical eye, the dress wasn't perfect, but she absolutely loved it and glowed in it.  Her husband loved it, too, and a wedding dressmaker can't ask for more than that.  


Sunday, April 26, 2009

Dress Sketches


As I mentioned in my previous post, I am making my sister's wedding dress.  My process for designing and making a wedding dress is essentially the same for each client--the bride and I talk a lot about what she wants in a dress, we pass pictures back and forth, she goes and tries on some dresses to solidify her likes and dislikes, and I make a sketch or sketches of possible dresses, she chooses one or elements from many, I revise the sketch if needed, I find a base pattern to work from, make a muslin of her dress, fit it, make changes, fit it again, buy the dress fabirc and trim, cut out the dress using the muslin, construct the gown and petticoats, and do two or three more fittings. 
I made several sketches for my sister's dress.  She had some things she was definite about--she wanted a shorter skirt (tea or ankle length) and some color, but other things were less clear.  Out of the set of seven sketches I did, she picked her favorite and we have happily gone from there.  I've included a few of the sketches above.  In my next post, I'll show you the muslin of her dress.

Saturday, March 28, 2009

Welcome to a New Sewing Blog!

I've been wanting to start a sewing/craft blog for awhile, but haven't because, frankly, as a new mom with a full-time job outside the craft industry, I have very little time to devote to my hobbies.  Since I have a million projects that are works-in-progress and nothing that's been finished recently, I'm going to revisit some of my past sewing projects.  I started out sewing as a kid by making clothes for my Barbies.  I still fondly recall a particular pair of brown corduroy coulottes I turned into a skirt for Barbie.  In junior high, I began sewing clothing for myself.  As an adult, I moved into sewing wedding dresses, which I loved doing.  I still do that occasionally; in fact, I'm working on my sister's wedding dress right now and will share the steps to that process with you as I go along.  I have recently become very interested in quilting.  My dream job would be to become a fabric/pattern designer.

Anyway, let me share some of my past wedding dresses with you.  Above are two of the wedding dresses I designed and made.  One is mine (on the dressform) and the other was for a friend.  I loved making these.  My dress was much more complicated and time-intensive than those I had made before it.  I also made it in secret, stealing an hour here and there, so my fiance wouldn't know what it looked like.  My friend's dress, made several years later, was even more complicated than mine.  It had three layers of tulle, each bordered with a different lace at the bottom.  The lacework took forever to sew on!  Though wedding gowns take a lot of time to make, I love the whole process.  I love talking with the bride, creating sketches for her to choose from, consulting with her on fabric and embellishment choices, drafting the patterns, and pushing my sewing skills to the max.  I love that once the dress is finished, I know that I have made something truly beautiful and unique that the bride will love and remember forever, and that will make her feel beautiful, too.  It's such a satisfying experience.